NOW DISCONTINUED
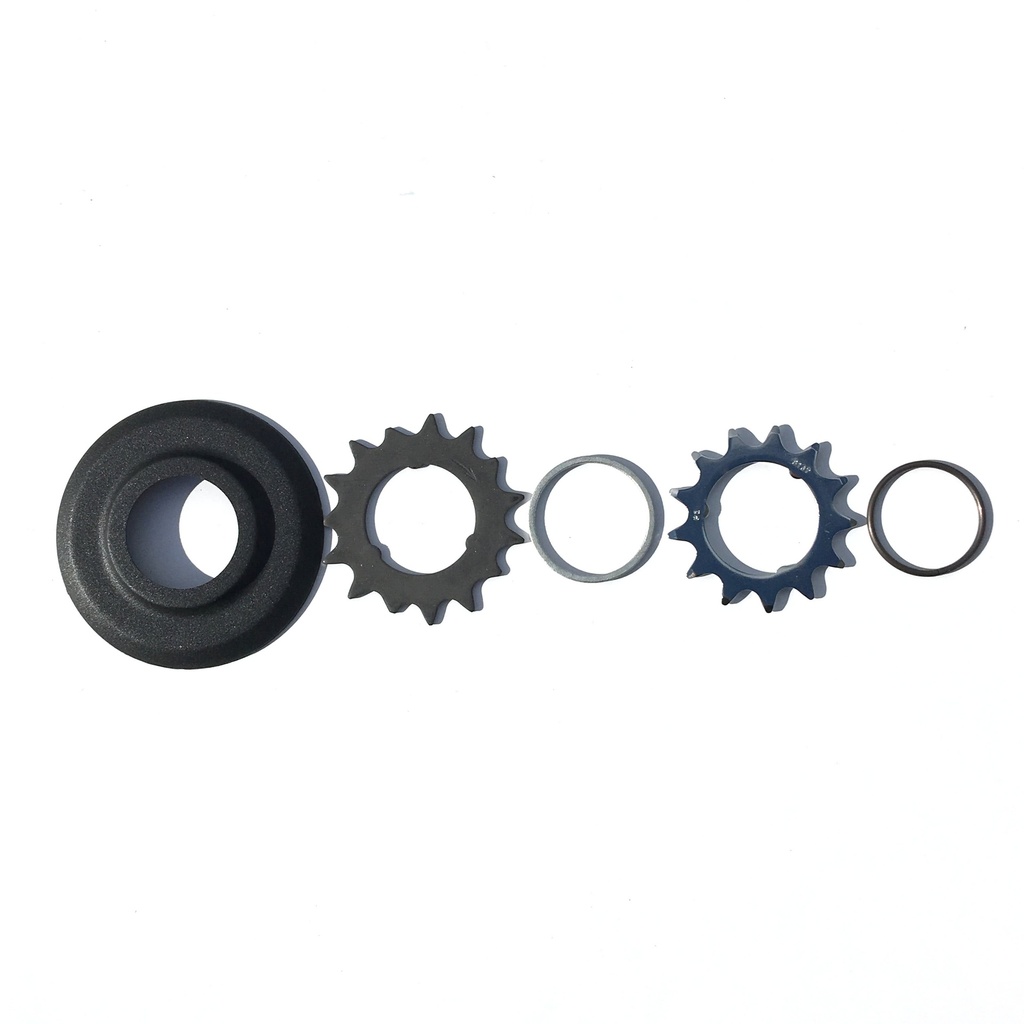
Brompton sprocket stack (that's the cogs and spacers) for a SRAM / SACHS rear wheel
This sprocket stack should be used with a 3/32" chain (QCHAIN098DR on 44T front, QCHAIN100DR on 50T front and QCHAIN102DR on 54T front). We recommend changing the chain when changing the sprockets and vice versa.
Not sure if this is the right one for you then check out below?
Contents of the packet
This set comprises the following kit for fixing to the Brompton / SRAM six speed rear wheel:
- Chainguard
- 15 tooth rear sprocket
- Sprocket spacer
- 13 tooth rear sprocket
- Circlip
What's a Circlip?According to Wikipedia: A circlip (a combination of circle and clip), also known as a C-Clip, Seeger ring, snap ring or Jesus clip is a type of fastene or retaining ring consisting of a semi-flexible metal ring with open ends which can be snapped into place, into a machined groove to permit rotation but to prevent lateral movement In the case of a Brompton wheel, it is used to hold the sprocket set in place. This is quite useful as it means no special sprocket tool is required. |

The above picture shows the SRAM 6 speed procket stack laid out ready for installation
A sprocket installation datasheet is also included in the pack
How do I know it's a SRAM / SACHS rear wheel?
And what is a SACHS / SRAM rear wheel
In approx year 2000, and not related to the mythical millennium bug - Sturmey Archer (who were supplying Brompton rear wheels) went bankrupt - before later being taken over by Sunrace and renamed as Sunrace Sturmey Archer
So for a short period SACHS - a german manufacturer of hub gears - hubs were used on Brompton bikes. To further confuse the issue, during this period SACHS were taken over by SRAM (the US bicycle component manufacturer)
The SACHS rear wheel is clearly labelled on the non (opposite to sprockets) drive side of the hub

Brompton SACHS rear wheel showing manufacturer marking
Tools required:
- Flat bladed screwdriver for removing / installing the circlip
- 15mm spanner for rear wheel removal
Step 1 - Put on the plastic chainguard
The chainguard just slides over the driver and sits nice and snug against the spokes - it is not keyed. Hollow side against the hub

Picture above shows chainguard fitted onto driver
Step 2 - install the larger - 15 tooth - sprocket
The sprocket set comes with two sprockets (the 6 speed combines a 3 speed internal hub gear and two sprockets to give a total of 6 gears)
The larger sprocket has 15 teeth, and is grey in colour (it is also available separately as well as part of this set as Brompton Q part code: QRSPR15DR - Brompton SACHS 15T sprocket)
It has an arrow on it showing which way it should be turning when the wheel is spinning (tip - this should be visible to you when the sprocket is slid onto the wheel / driver)
The driver has 3 grooves in it - which should be lined up to allow the sprocket to fit

Picture above shows 15 tooth sprocket fitted onto driver
Step 3 - install the sprocket spacer
The sprocket spacer is 2.2mm wide and keeps the two sprockets the correct distance apart for the Brompton derailleur to function correctly
The spacer is not keyed

Picture above shows sprocket spacer fitted onto the driver
Step 4 - install the smaller - 13 tooth - sprocket
The smaller sprocket is the smaller in size, and is silver in colour. It also has a flange / step on it. This should be facing towards the hub of the wheel.
It is keyed so has to line up with the three grooves on the driver - like the 15 tooth sprocket

Picture above shows 13 tooth sprocket fitted onto the driver
Step 5 - install the circlip
This is the trickiest part of the procedure
All of the sprocket set is now fitted and the circlip has to sit snugly in the groove near the outside of the diver. This is what holds the sprockets in place.
Prise the circlip onto the driver using a flat blade screwdriver - ensure it is sitting properly in the groove. There will be a 5mm-6mm gap where the circlip would otherwise join

Picture above shows the circlip installed and sprocket set now ready
You are now ready to install the wheel and ride off into the sunset
This video from Brompton shows how to remove and re-install the sprocket set.
Brompton Q part code: QRSPRSTACK-SR6
Brompton part number: 9024216